Scenesaver is a direct descendant of Genesaver , using the same concepts of machine learning and artifical life to create organic-looking motion on your screen. Instead of a virtual ecosystem, Scenesaver more closely resembles dynamic art, using the motion of its creatures to blend between different user-specified images.
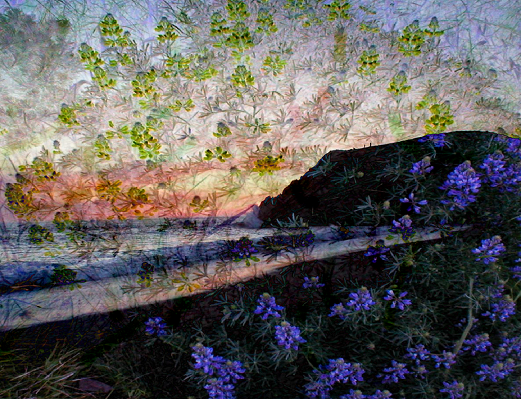
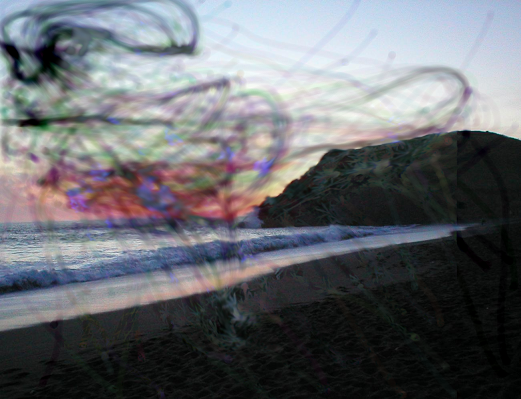
The first screenshot illustrates the "image diff" concept that drives Scenesaver's image transitions - the difference between two images is computed by subtracting their RGB color values, and the images are then blended by having a group of AIs eat away those differences, as seen in the second screenshot.
Like Genesaver, Scenesaver uses OpenGL for its display. It also uses the Qt image library, so if you don't already have any Qt-based applications, you'll need the DLL (see installation instructions).
Complete documentation can be found here. Bare minimum getting-started instructions are below.
*.scr)
files go. On most systems this directory is either C:\WINNT\System32
or C:\Windows\System32.
Scenesaver.scr
in your system directory.
qt-mt336.dll
and save that as well. You may also need msvcr71.dll.
Scenesaver can produce a surprisingly wide variety of visual effects if you play with the configuration options a bit, so I strongly encourage it. Hitting "Settings..." from the Windows screensaver configuration dialog will bring up a SceneSaver dialog that lets you tweak everything.
In particular, I recommend throwing some cool images in your SceneSaver folder (it'll be the folder called "SceneSaver" in the system folder where you saved the screensaver itself) and telling SceneSaver to use them; by default SceneSaver will draw random fields of color, but photos and so forth tend to look much cooler.
You can also get a variety of interesting effects by tweaking the simulation settings; for example, the "painter" AIs can cut sharp swaths through your images or subtly blend and smear them depending on how they're configured. Many of the options have a strong impact on SceneSaver's performance, so if it runs a bit slowly on your machine you might (for example) want to cut down on the number of AIs and/or turn off the fancy smudging effects. And if you have horsepower to spare, it looks really cool to have 100 smaller AIs swarming around each other and smearing the images in different directions. Experiment!
Contact me: spamwise at gmail dot com. Questions, suggestions, and feedback welcomed.
This page last updated on $Date: 2006/10/05 $.